How to install Minecraft Java edition on the Steam Deck
Overview
In this guide, we'll walk you through the steps to install Minecraft Java edition on the Steam Deck and get it up and running on the latest version of the game, Minecraft 1.18.2.
This same guide applies if you want to play Minecraft with mods on the Steam Deck, but we'll expand on that in a later guide.
Steps to install Minecraft Java edition on the Steam Deck
- Open Desktop Mode
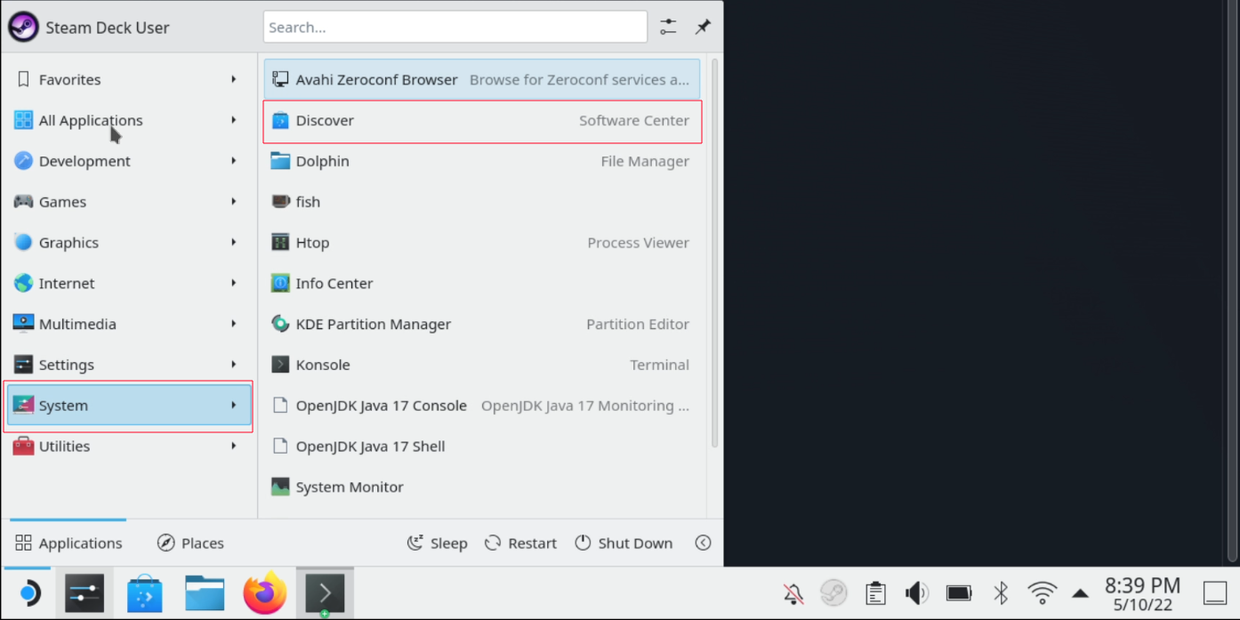
- Open the Discover app store. It can be found in the Start menu, under the System category.
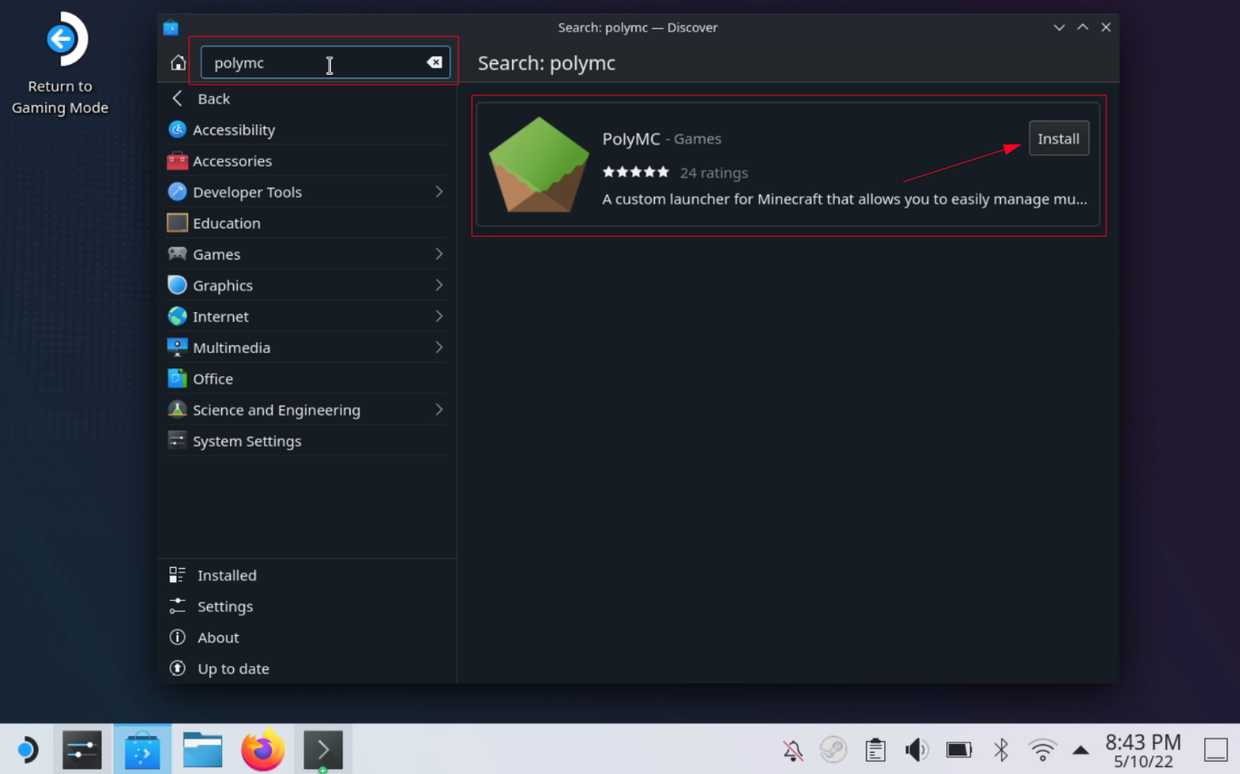
- Search for PolyMC and click on the Install button
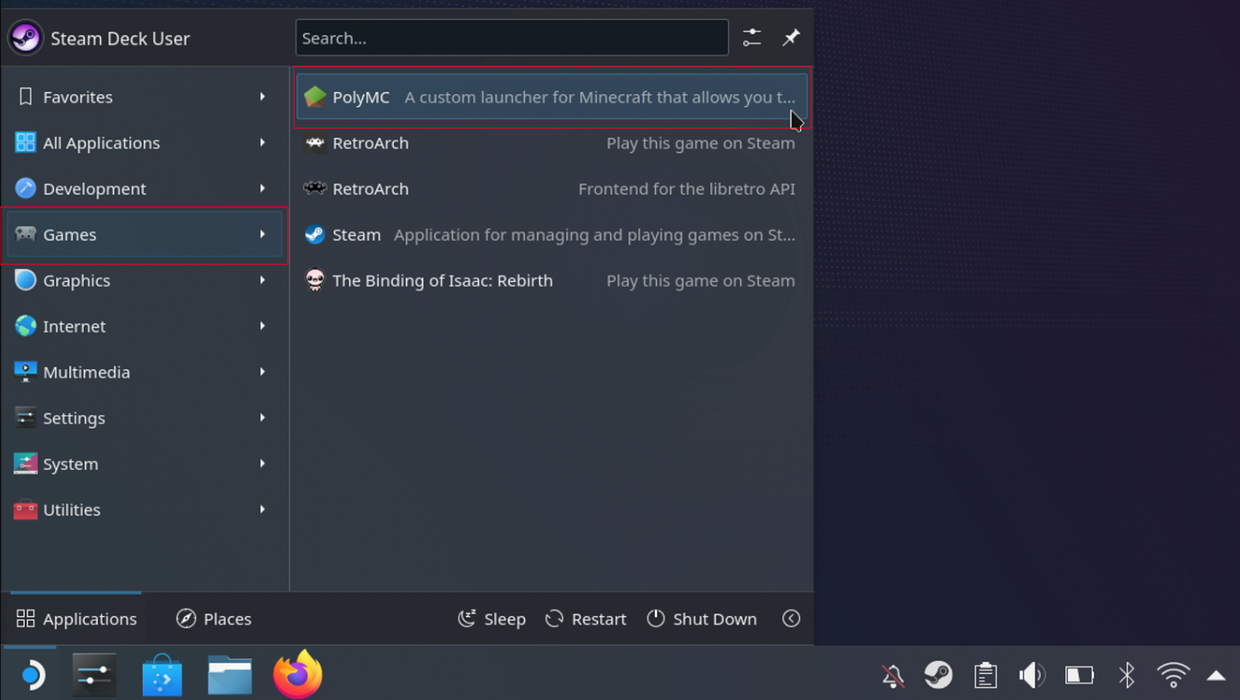
- Open the Start menu again, and now search for PolyMC. It can be found in the Games category.
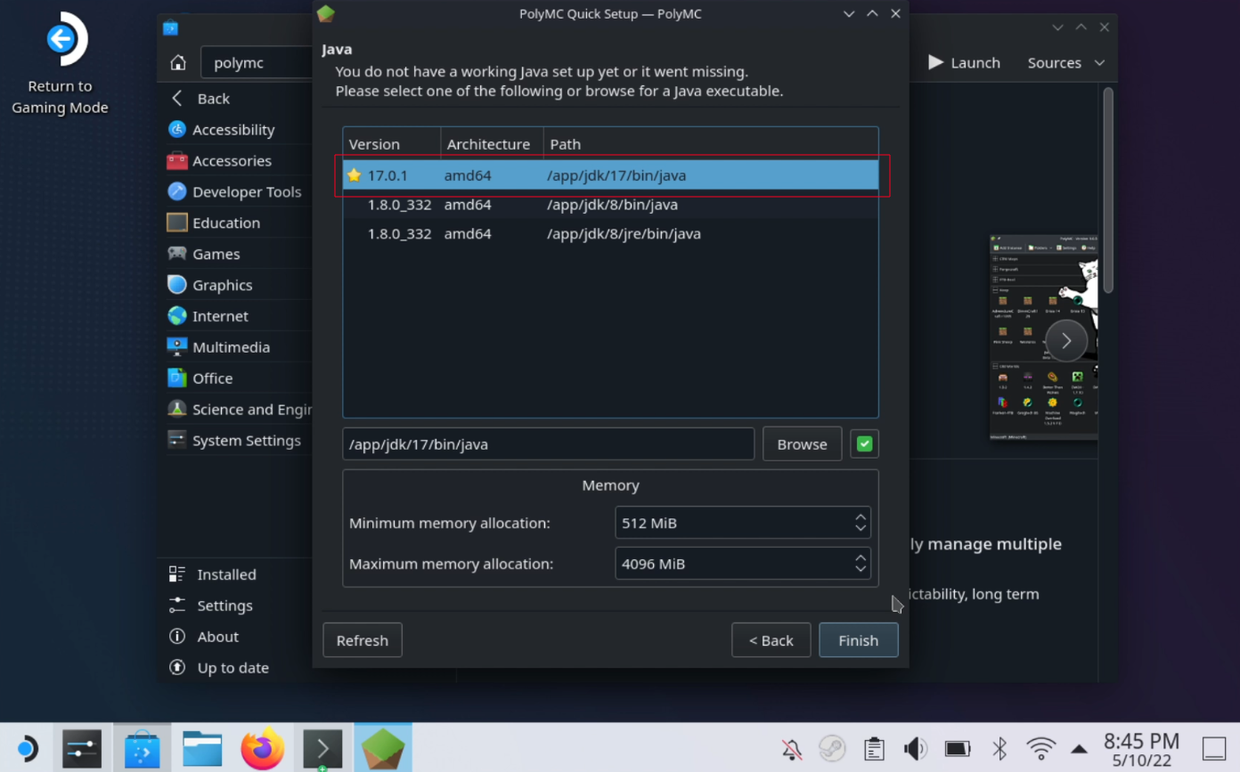
- On first launch, you will be asked to select the language you want to use, and the Java version. If you want to play Minecraft 1.18.2, you should pick Java 17.
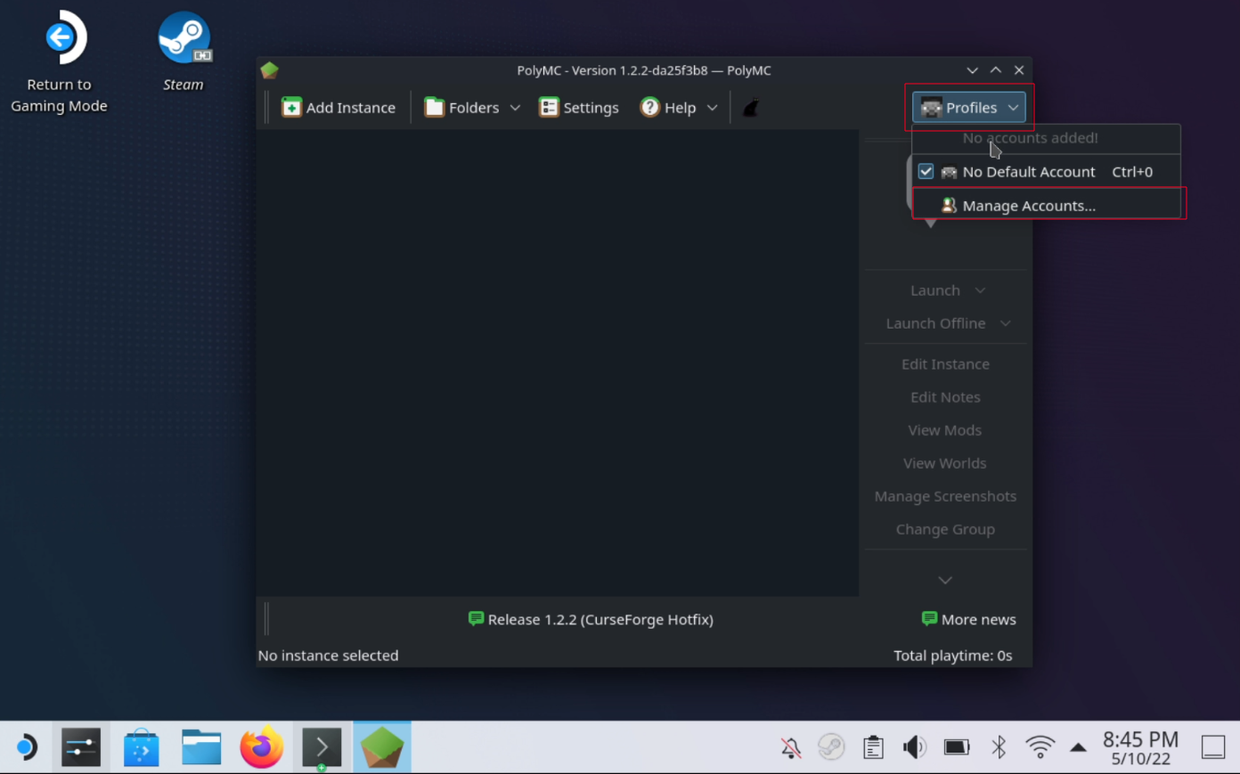
- After that, we need to connect PolyMC with our Minecraft account. Click on Profiles, then Manage Accounts....
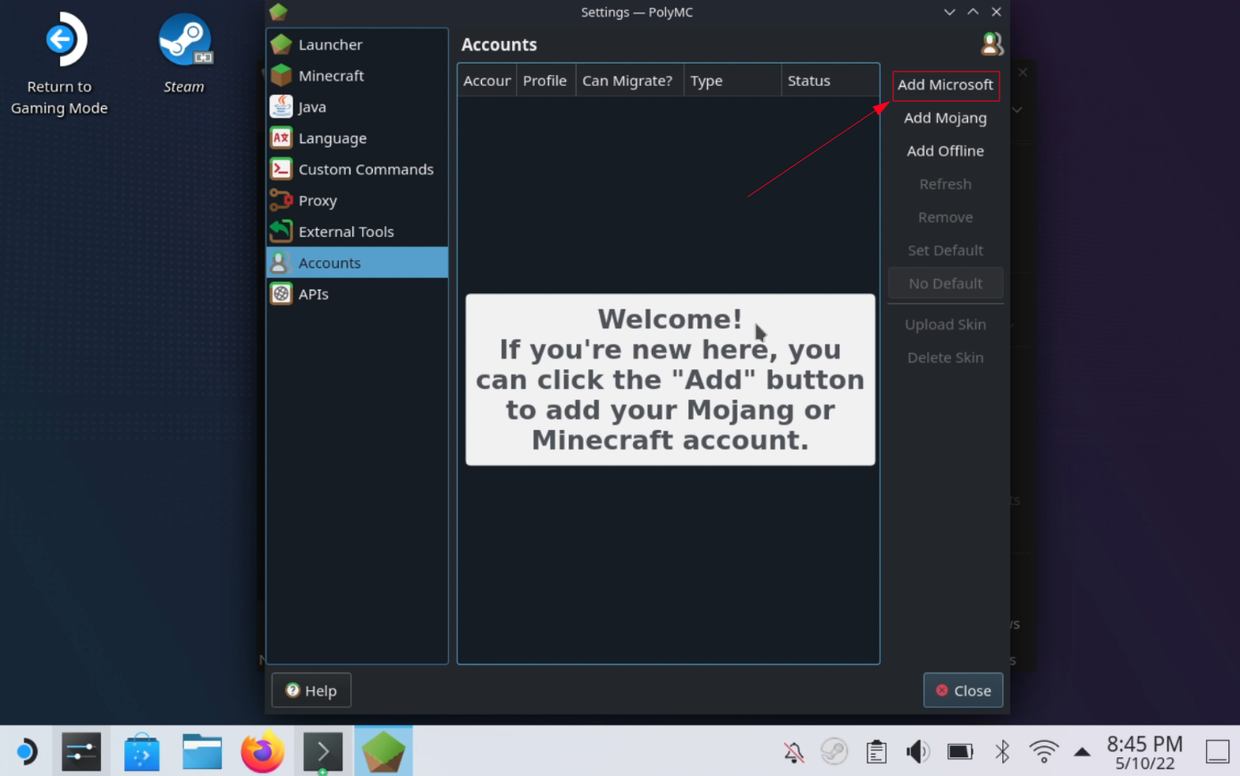
- To add a Microsoft account, click on Add Microsoft, if you still have a Mojang account, click on Add Mojang. For a Microsoft account, you'll need to follow the instructions.

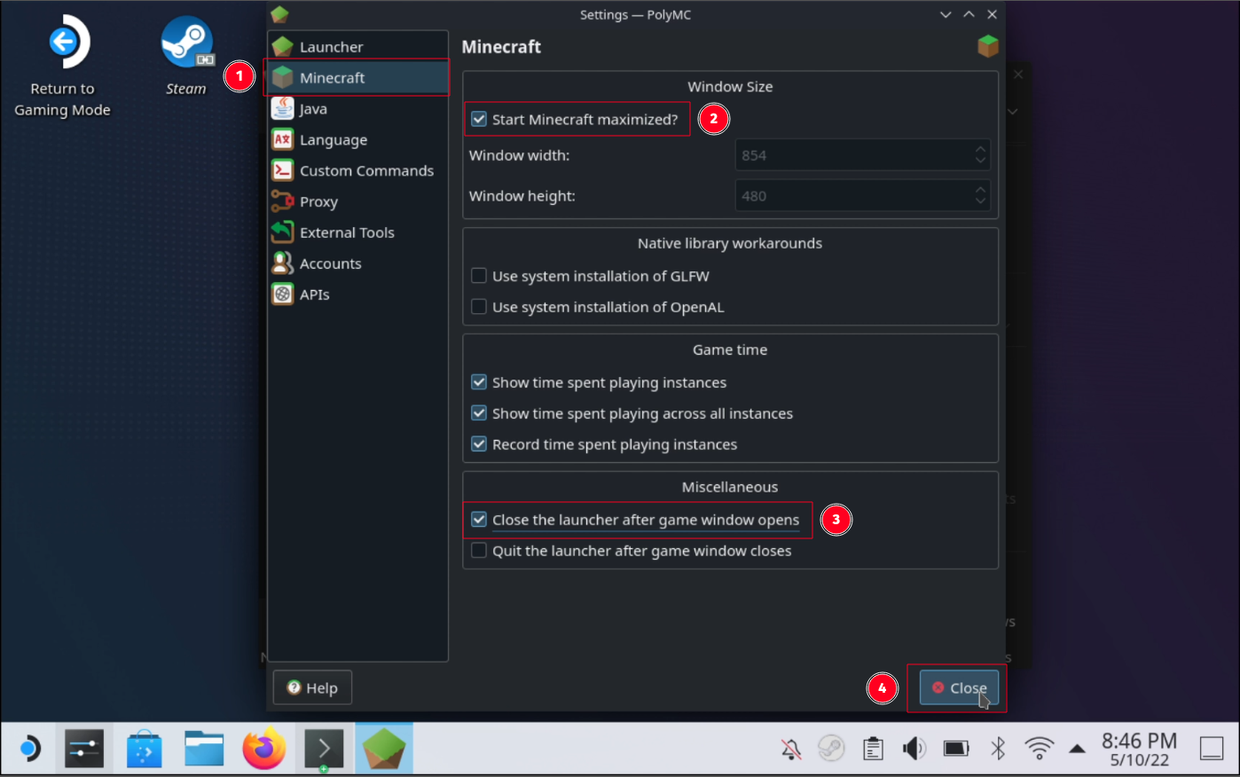
- After adding your account, let's configure PolyMC so it plays nice with the Steam Deck in Gaming Mode. On the sidebar, go to Minecraft. Then make sure to check Start Minecraft maximized and Close the launcher after game window opens. Once you're finished, click the Close button.
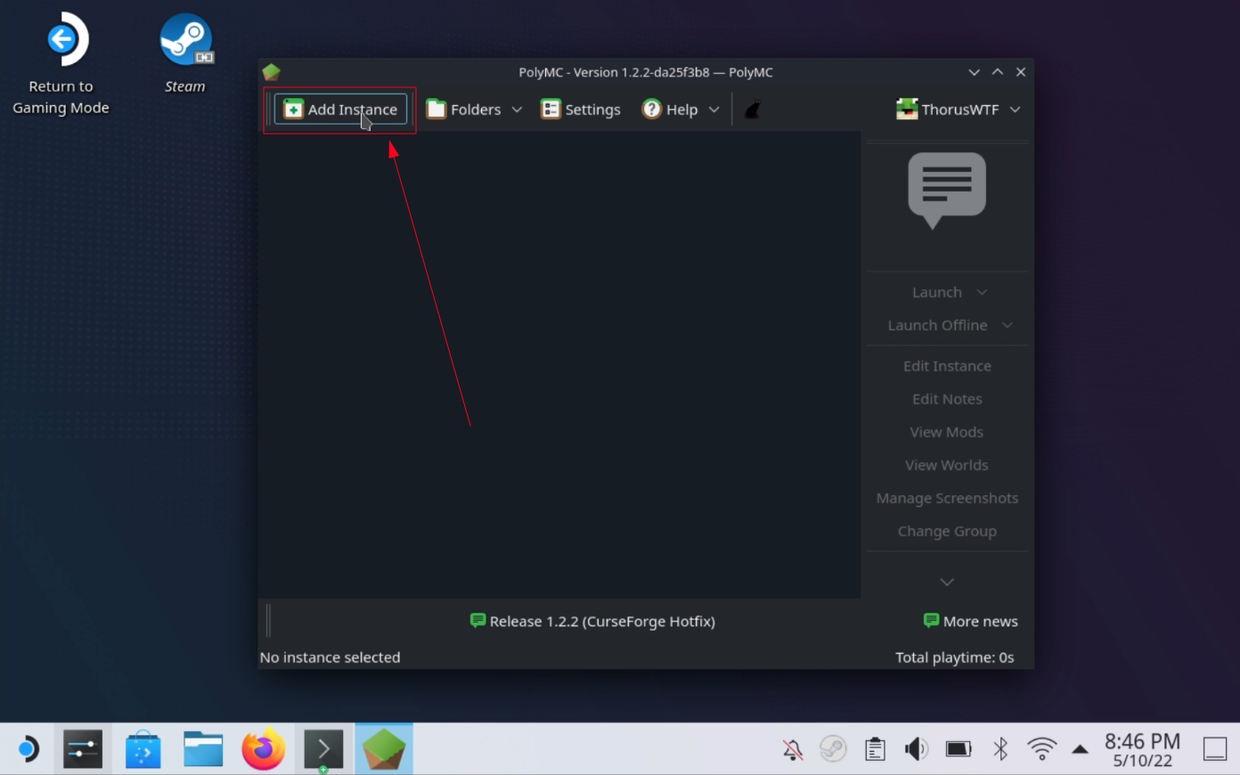
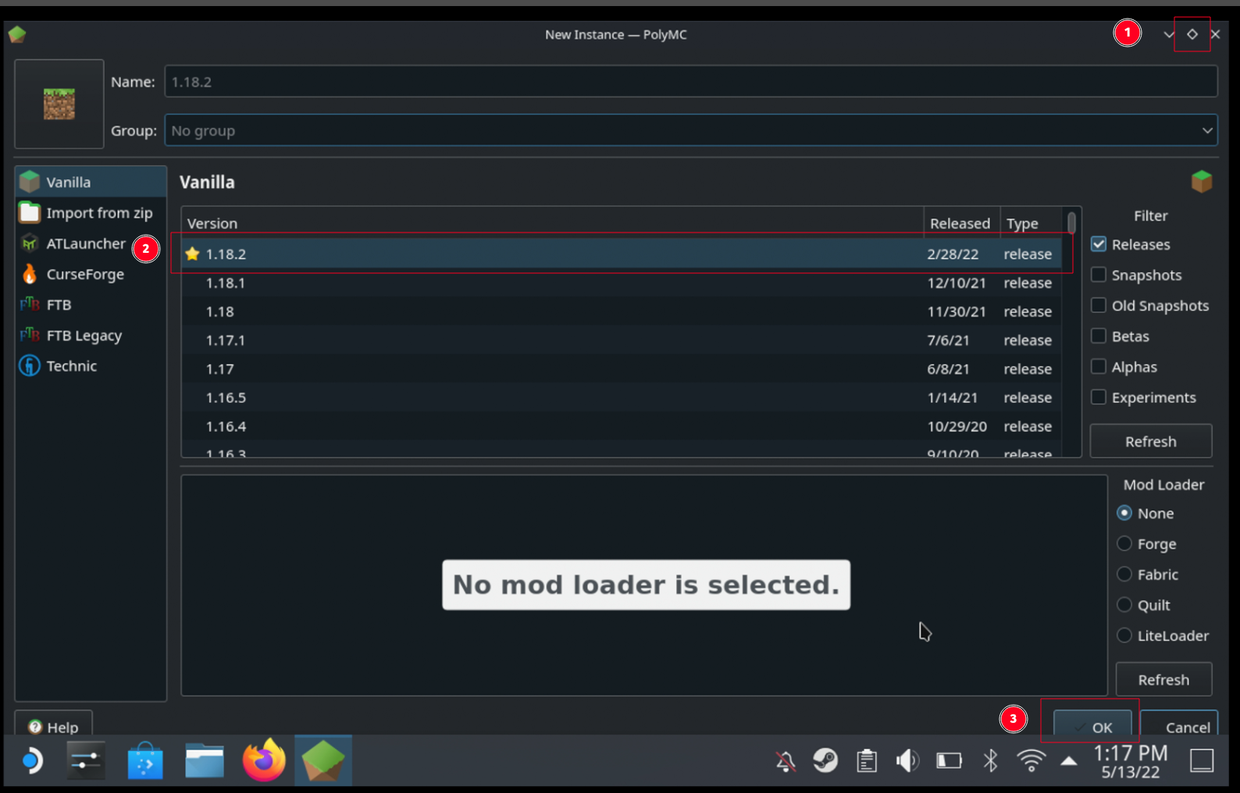
- Now, let's create a Minecraft instance by clicking on the Add Instance button.
- You'll probably need to maximize the window, otherwise the OK button to save the instance won't be visible. Select the Minecraft 1.18.2 version, and hit the OK button.
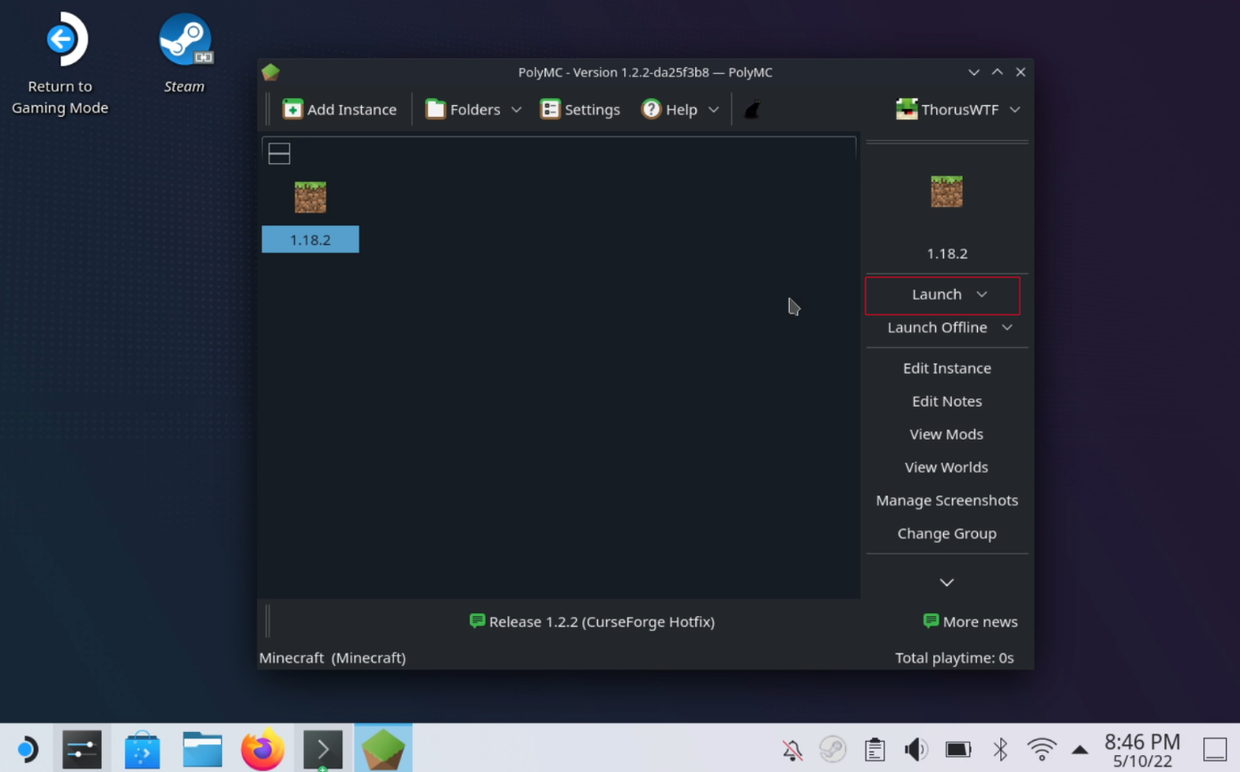
- We can now launch the instance to make sure everything worked! Select the 1.18.2 instance, and click the Launch button.
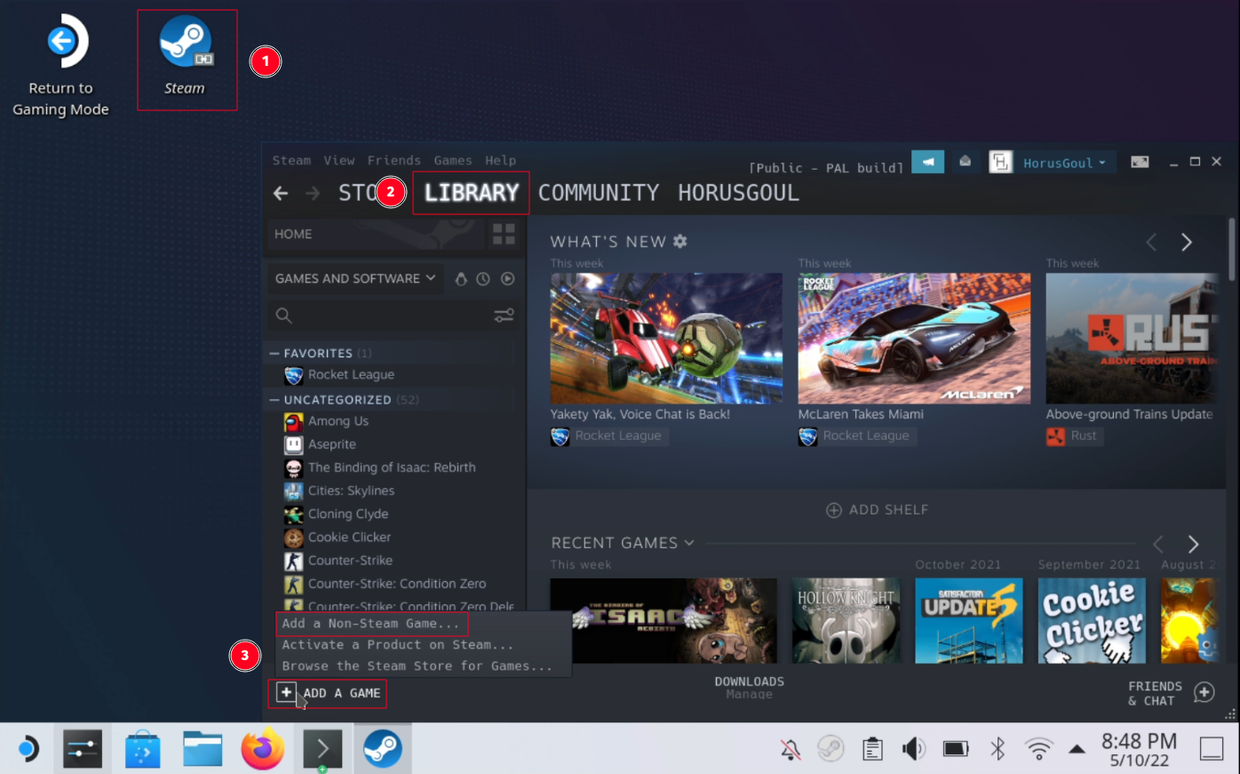
- Now, let's add it to our Steam Library so we can access it from the Gaming Mode. Open Steam, and click on Library. On the bottom left of the library screen, you'll see the Add a game button, click it, and then select the Add a Non-Steam Game... option.
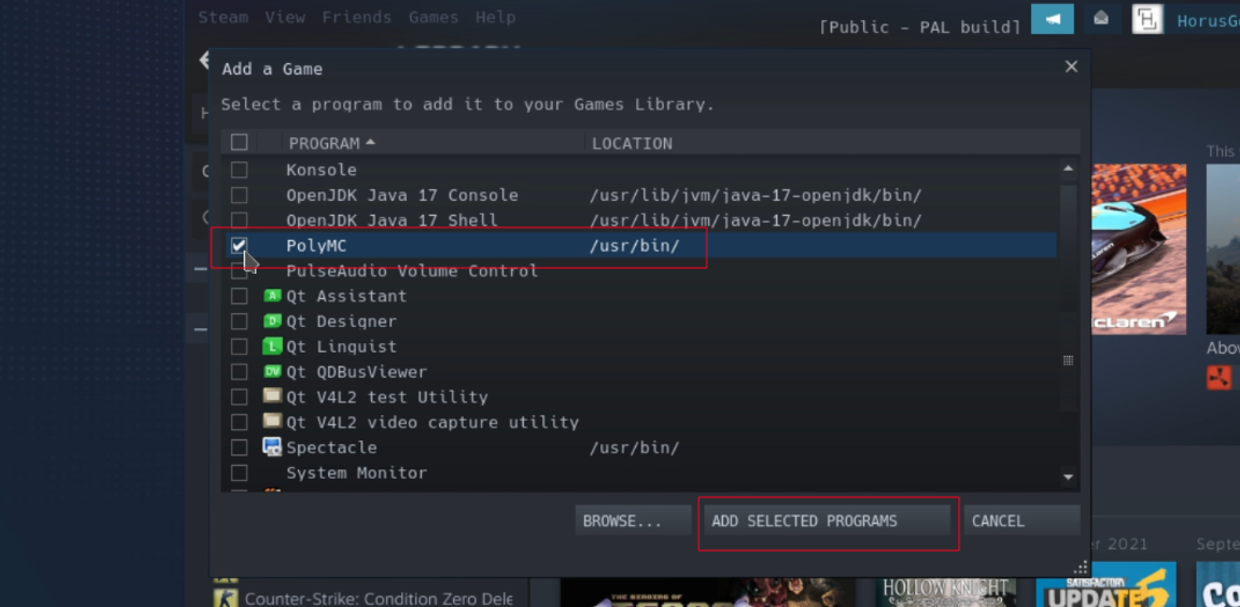
- A window will open, with a bunch of programs we can add. Look for PolyMC, check it, and click the Add selected programs button.
- Once that's done, we can now go back to Gaming Mode so you know where to find the game we just added. Click the Return to Gaming Mode icon in your desktop.
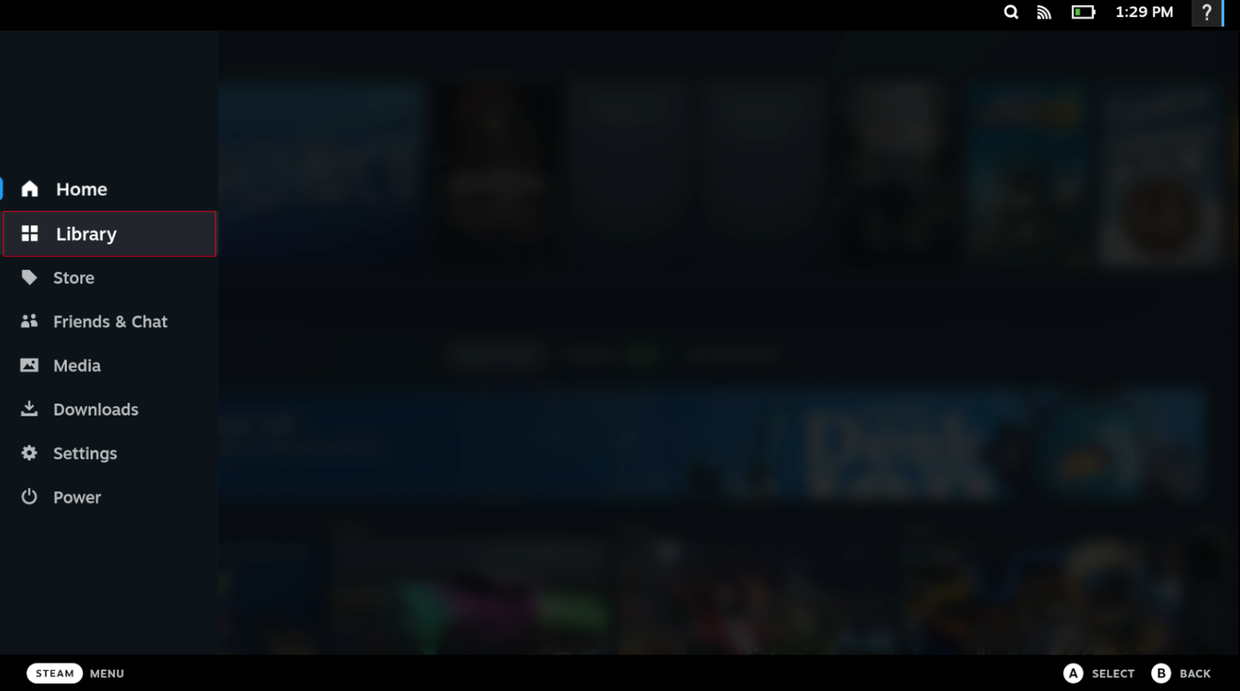
When you're back in Gaming Mode, press the
STEAMbutton of your Steam Deck, and then click on Library.
- Inside the library, there's a section for Non-Steam games. There should be a PolyMC entry.
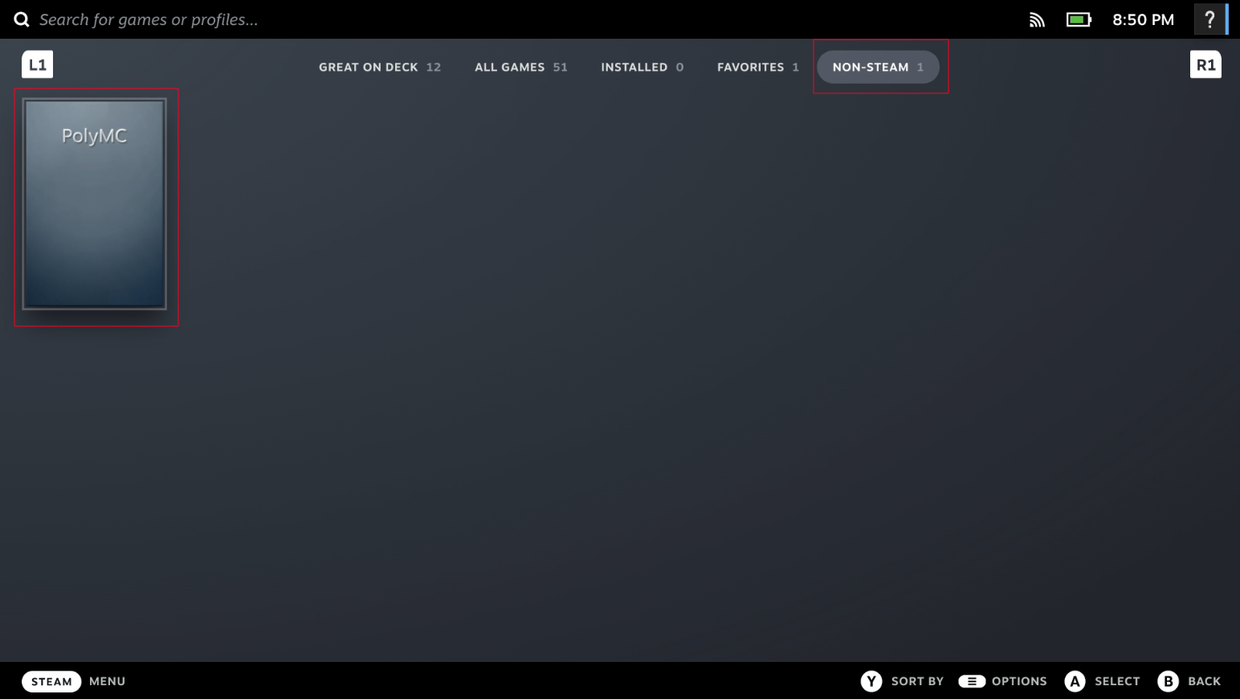
- That's it! You should now be able to play Minecraft in the Steam Deck. You can rename the entry, change the icon, or whatever you want.
FAQ
I installed Minecraft following the instructions, but the controls don't work, what's wrong?
You probably need to change the controller configuration! Since Minecraft is not an officially supported game, you need to use Community Controller settings or create your own.
Can I play Minecraft with mods on the Steam Deck?
Yes! PolyMC allows you to install Modpacks, which are a way of adding mods to your Minecraft instance. You can also add them manually through the PolyMC settings.
Can I play a different version of Minecraft on the Steam Deck?
Yes! You can create multiple instances with different versions of Minecraft. However, old versions of the game use a different Java version so you'll need to configure the instance to use a different one, like Java 8 for Minecraft 1.12.